
Online tools guide
Everything you need to use DTFForge online, from the first file you upload to the proof approved by your customer. Button names are the ones used in the app.
Create your account
- Open DTFForge online and click Create an account. Enter your e-mail address and a password of at least 10 characters.
- Open the e-mail you receive and click the link: your address is confirmed and 10 free tokens are added to your account. Nothing received? Check your spam folder, or click Send the e-mail again.
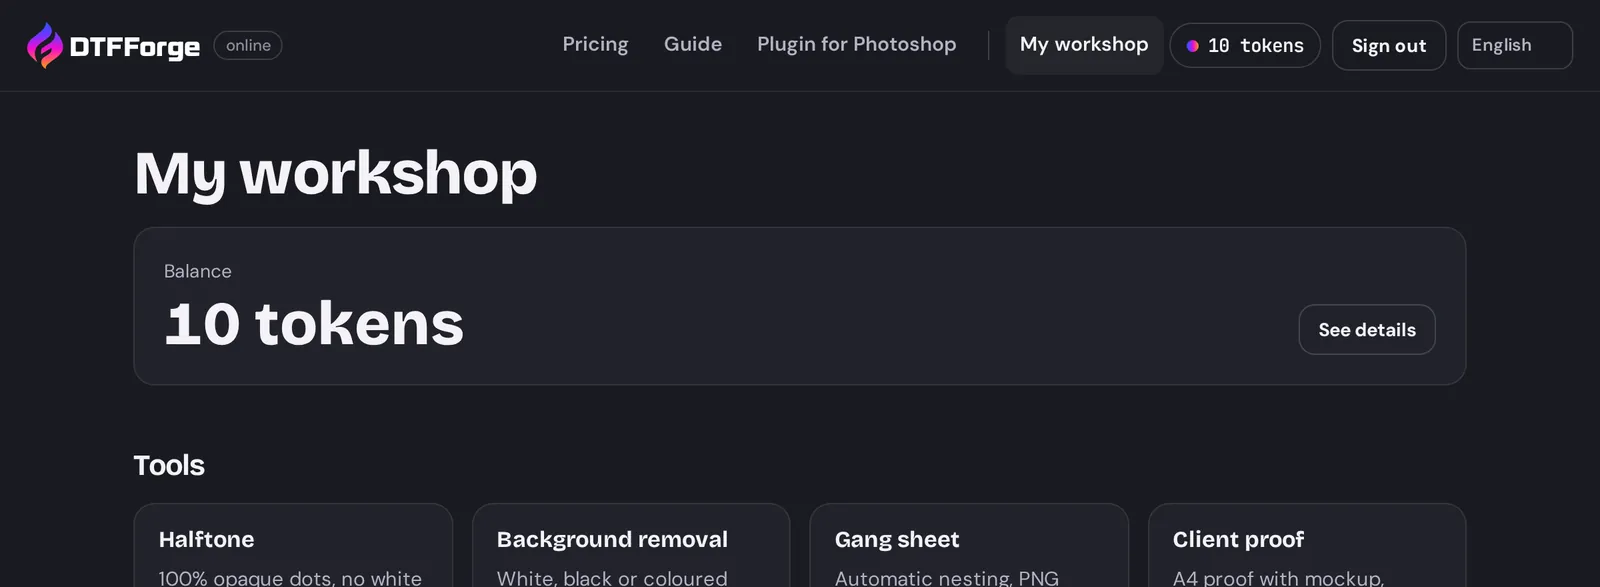
- You land in My workshop: your token balance and the four tools. The menu at the top gives access to your tokens and to the app language.
Forgot your password? On the sign-in page, click Forgot password? and follow the link sent by e-mail. Disposable e-mail addresses are not accepted.
Tokens, subscription and packs
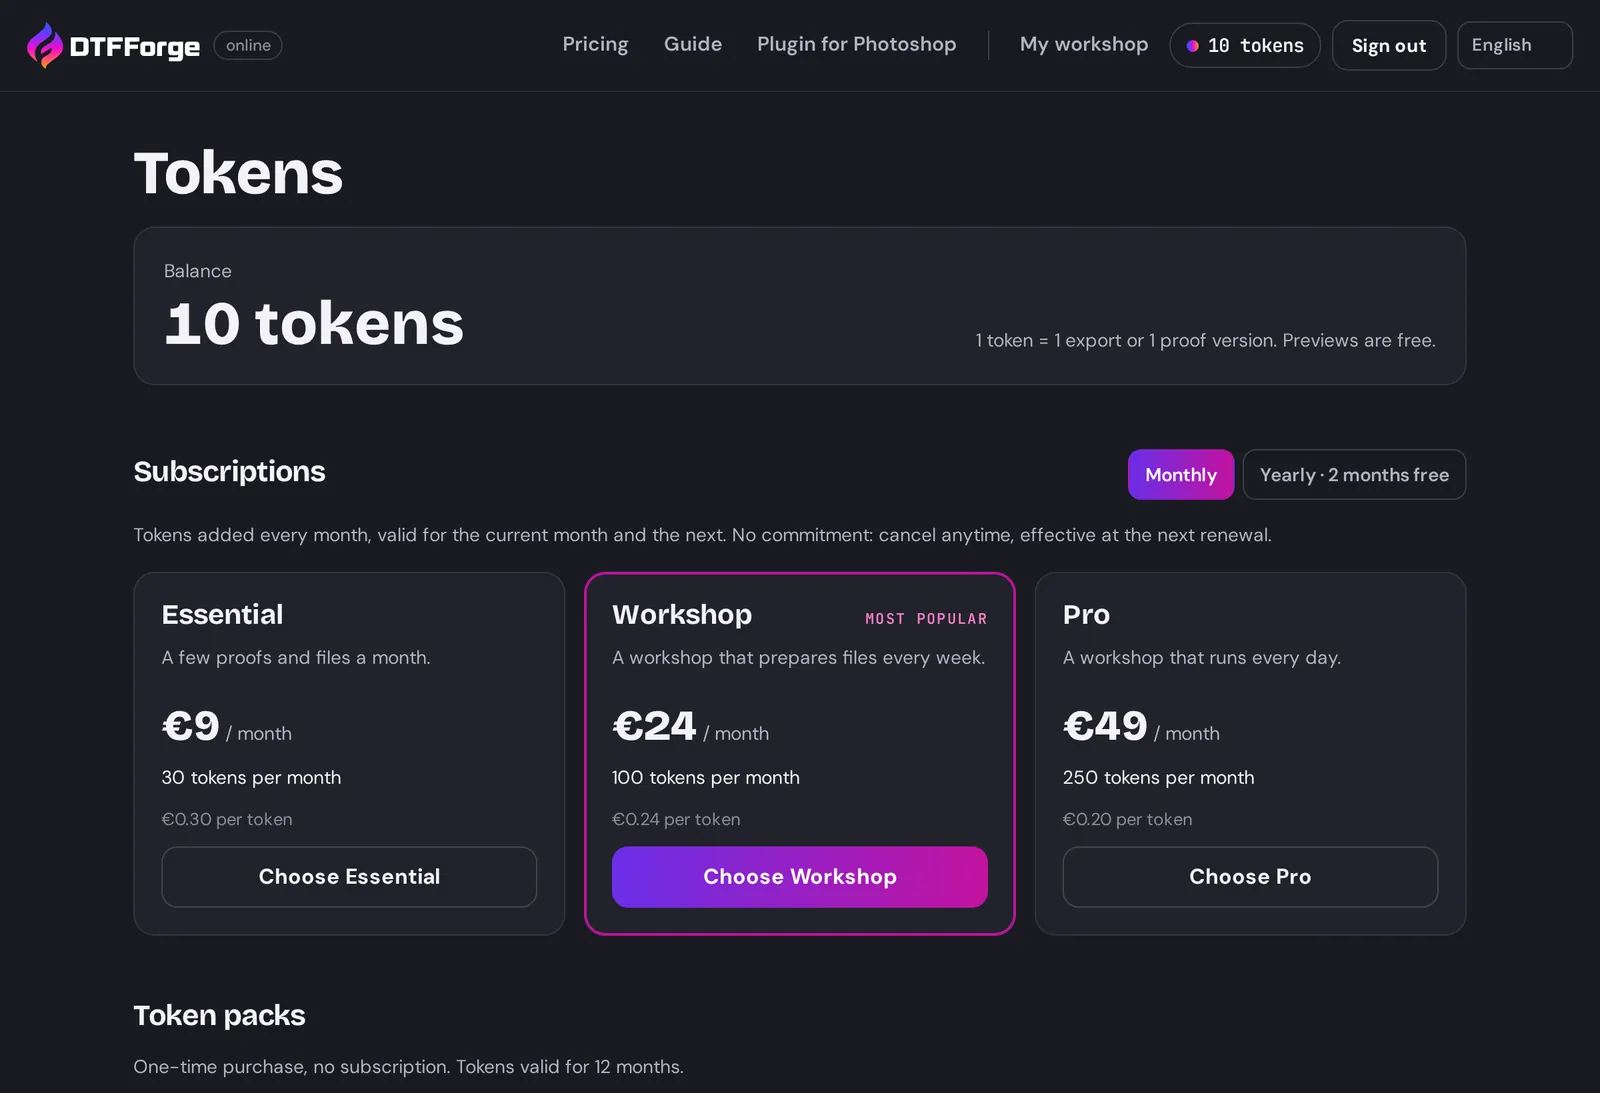
1 token = 1 exported file (a Halftone, a design with its background removed, a gang sheet) or 1 proof version. Previews are free: adjust as much as you like, only the export counts. If an export fails, the token is refunded automatically.
Subscriptions
Three plans, monthly or yearly (2 months free): Essential (30 tokens a month), Workshop (100) and Pro (250). Tokens are credited every month, even with a yearly subscription, and stay valid for the current month and the next: whatever you don't use rolls over to the following month.
Token packs
10, 50 or 150 tokens, as a one-off purchase, valid for 12 months. Handy on top of a subscription, or for an occasional need.
Paying
- Open Tokens (the balance at the top of the screen).
- Tick the box to accept the terms and conditions: it is required before every purchase.
- Click the plan or pack you want. You pay by card on Stripe's secure page (DTFForge never sees your card), then come back to the app: your tokens are there.
Managing your subscription
- Change plan: a higher plan takes effect immediately (the difference is charged pro rata and the extra tokens arrive straight away); a lower plan takes effect at the next renewal.
- Cancel: the subscription stops at the next renewal, and your tokens stay valid until their date. You can resume the subscription until then.
- Card, address and invoices: change your card, address or VAT number, and find your invoices.
An invoice is sent with every payment; they are also listed in Payments and invoices. To switch from monthly to yearly, cancel, then choose the yearly plan when the period ends. Tokens that expire first are used first.
Your images and files
Every tool starts with an image: PNG, JPG or WebP, up to 100 MB. Drag it onto the upload area, or click to choose it. An uploaded image can be used in every tool.
- My images: your uploaded images, kept for 7 days then deleted automatically. You can delete them sooner.
- Exported files: each tool lists its files. Downloading them again is free for 7 days.
- Print size: up to A3+ (35 × 50 cm) for a Halftone or a design with its background removed. Files come out as 300 ppi PNGs: print them at their size, without resizing.
Previews are scaled down and carry a "dtfforge.com" watermark. The exported file is full resolution, without watermark.
Halftone
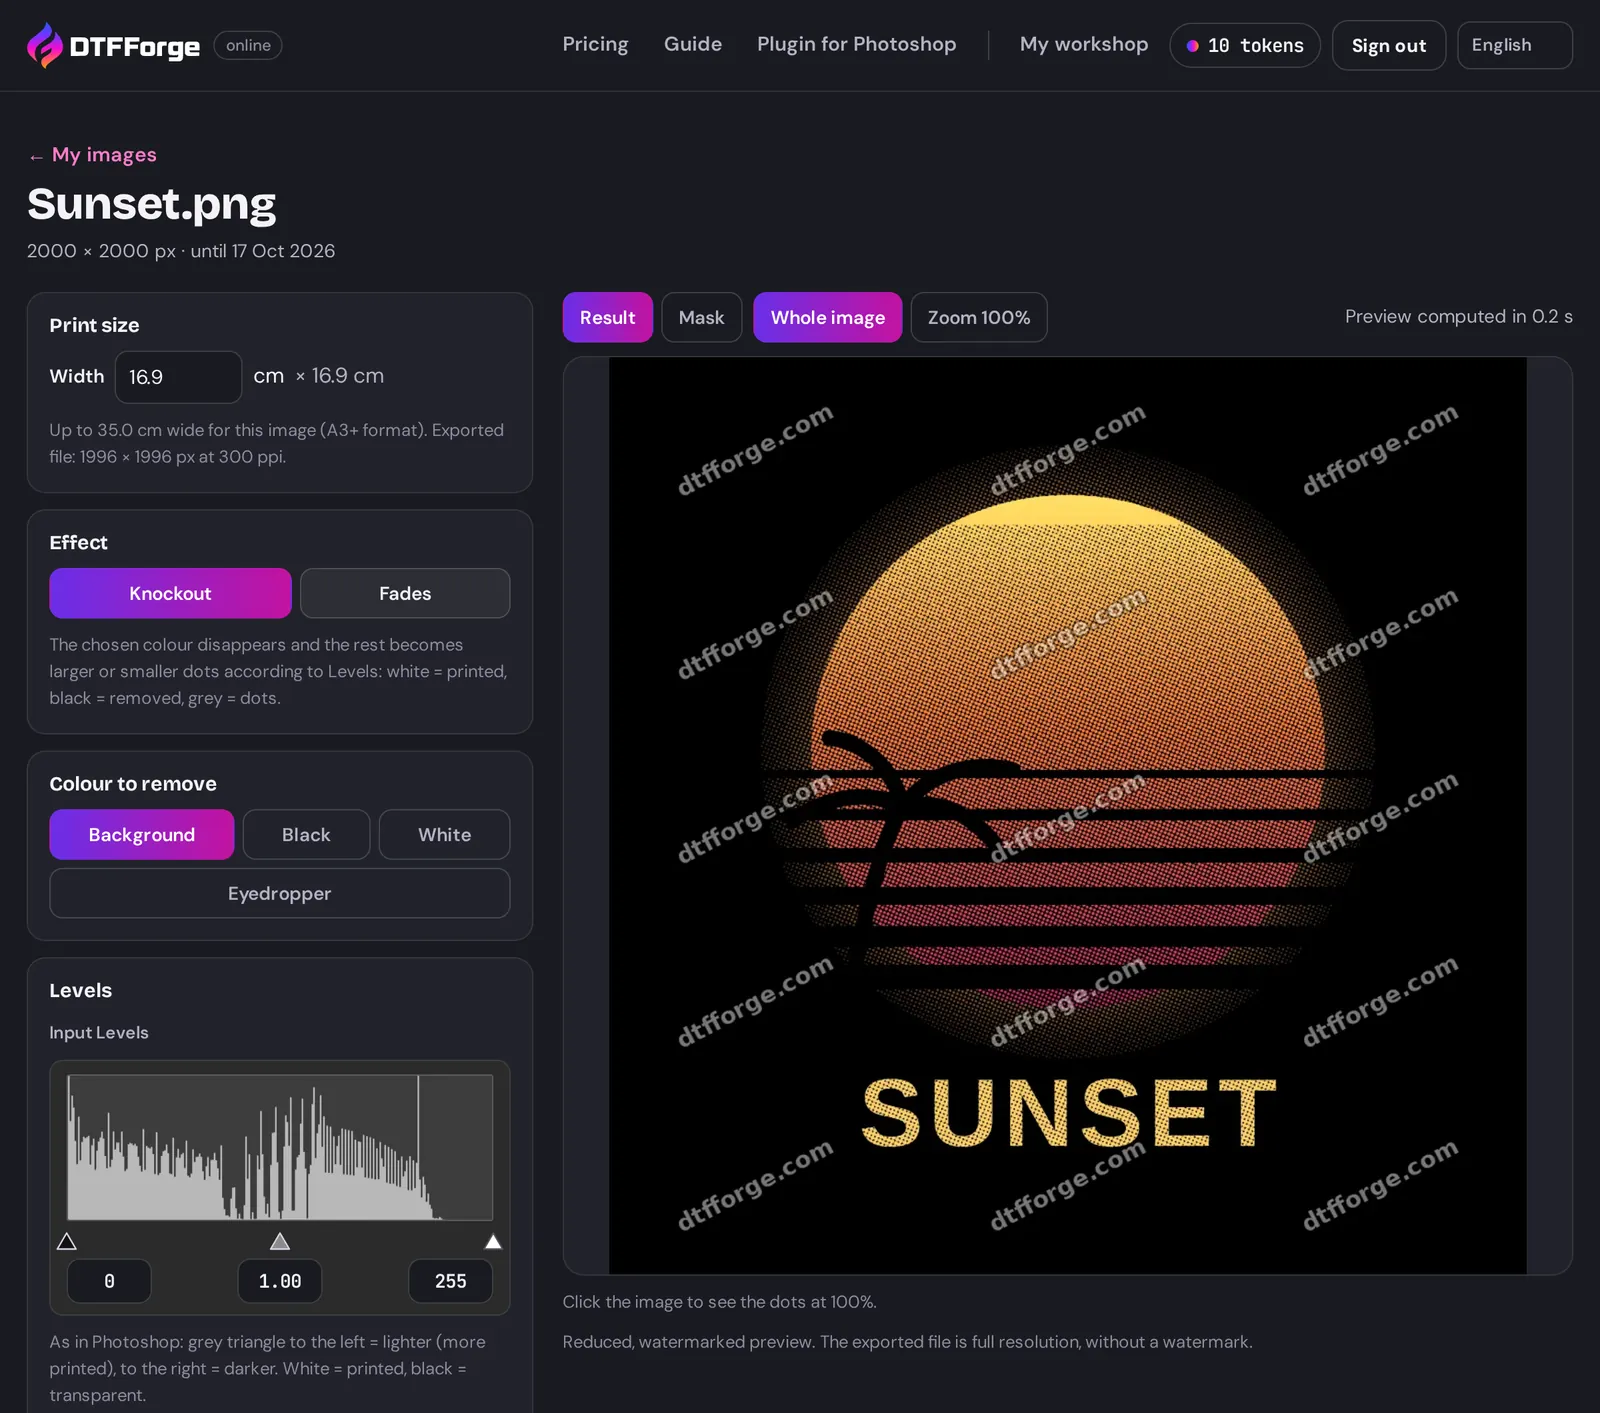
Turns an image into 100% opaque dots: gradients and transparency print in DTF, with less film and a softer hand feel.
Effect
- Knockout: the chosen colour disappears (the shirt shows through) and the rest becomes larger or smaller dots. For a photo or a design on a background.
- Fades: for a PNG that already has a transparent background. Only the semi-transparent areas (shadows, glows, gradients to transparent) become dots; the rest stays solid.
Colour to remove
Background takes the background colour of the image. Choose Black or White, or Eyedropper to click on the original image or type the colour code.
Levels
Just like Photoshop: white = printed, black = transparent, grey = larger or smaller dots. Drag the triangles or type the values; Reset goes back to the start. The Mask view shows this mask in black and white: it's the best way to see what will be printed.
Screen
Screen ruling (LPI): 25-30 for big, vintage-looking dots, 35 for a good compromise, 45-55 for a finer but more fragile screen. Also choose the Angle and the Shape (Dots or Lines).
Preview
Shirt colour (preview, never printed): show the preview on the colour of your garment. Click the image to see the dots at 100%, then Whole image to go back.
Advanced options
- Minimum dot (mm): smaller dots are removed, because they wouldn't hold the powder.
- White choke in your RIP (px): if your RIP chokes the white underbase, enter it here; the minimum dot takes it into account.
- No solid areas (vintage effect) and White dots (instead of the image colours) for special effects.
The Report sums up the screen, the colour removed, the smallest dot, the printed area saved and the file size. Export: the 300 ppi PNG costs 1 token and appears in My Halftone files.
Background removal
Removes a white, black or coloured background, trims the design and sets it to print size, like the plugin's File preparation module.
Background to remove
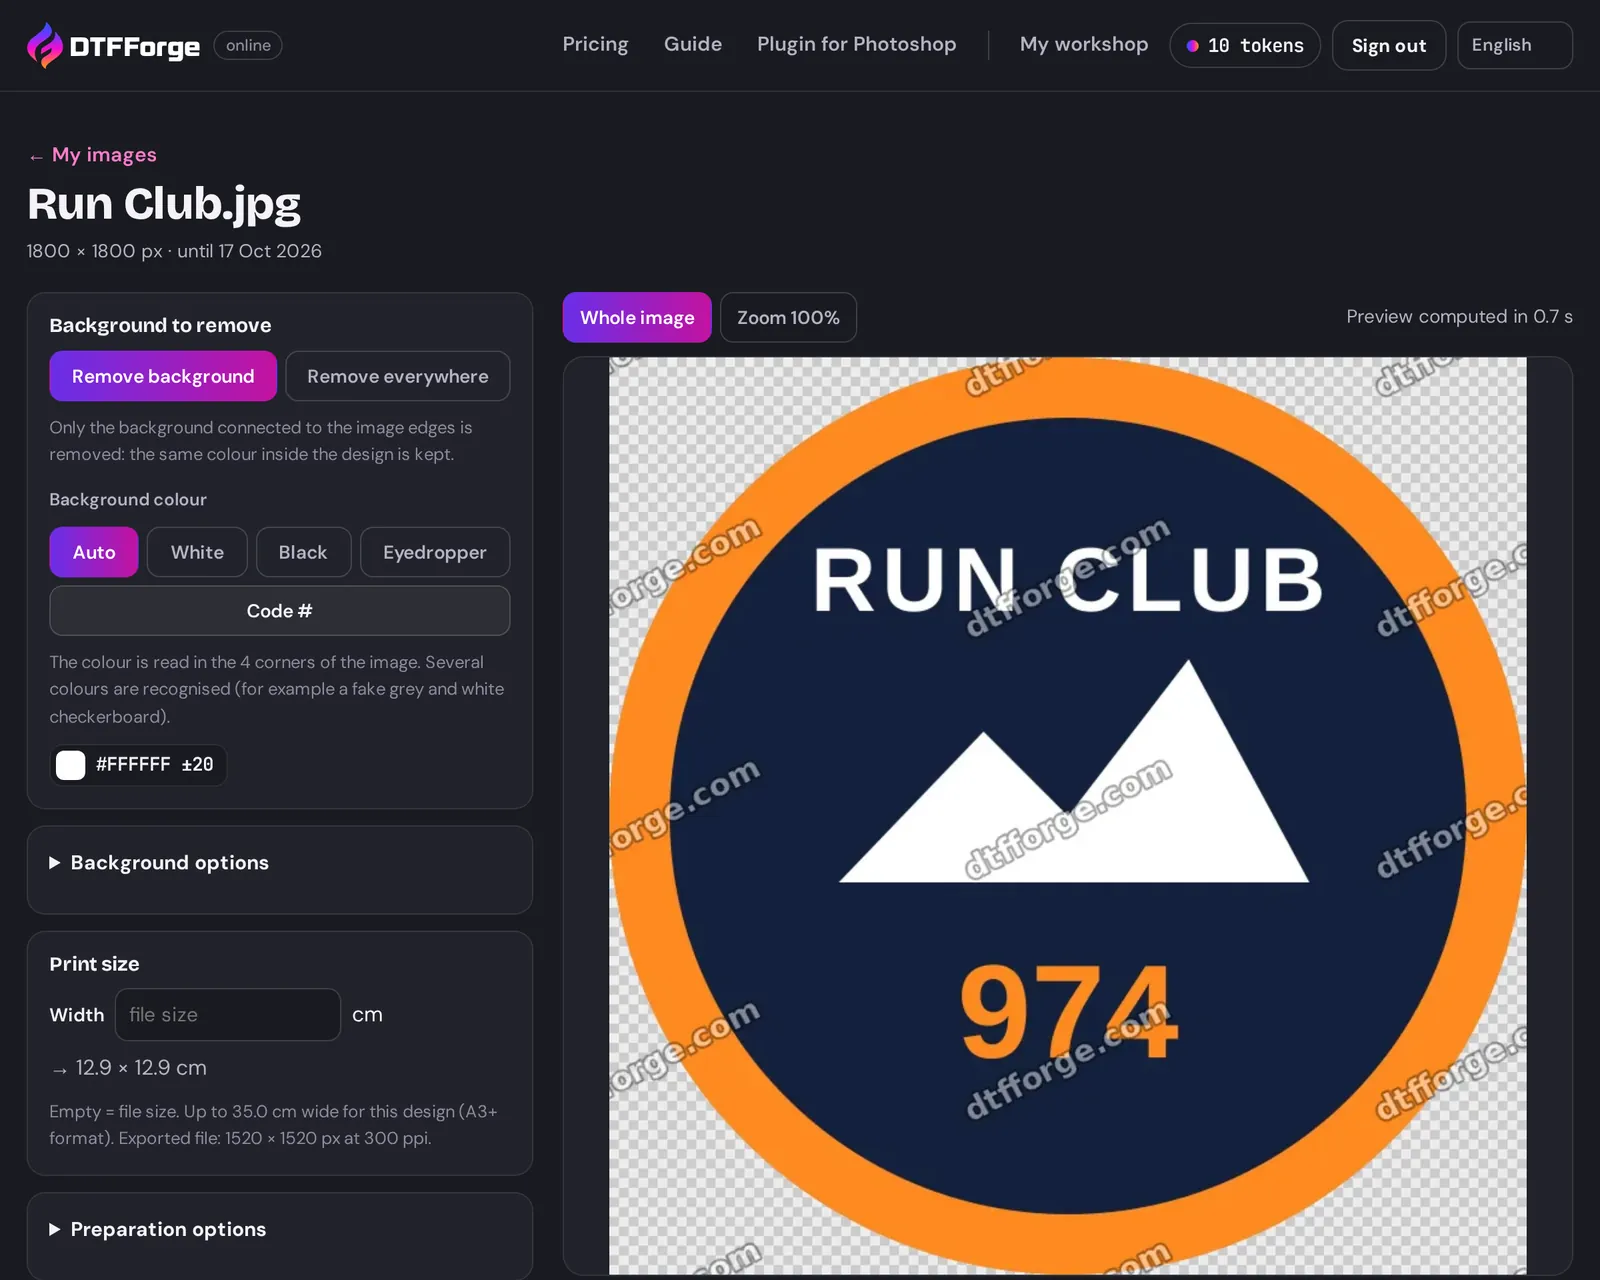
- Remove background: only the background touching the edges of the image disappears; the same colour inside the design is kept.
- Remove everywhere: the colour disappears everywhere, including inside a letter.
Background colour
Auto reads the colour in the 4 corners of the image (several colours are recognised, for example a fake grey and white checkerboard). Otherwise: White, Black, Eyedropper (click on the background) or Code #.
Options
- Tolerance (%) (in Background options): 8% by default. Higher, an uneven JPEG background comes off better, but so do similar colours in the design. Clean the fringe around the design removes the halo of the old background.
- Smooth edges (recommended) (in Preparation options): a clean outline, without jaggies or fringe, even when enlarged. Untick it to get exactly the plugin's result.
- Clean semi-transparency: below the threshold, a half-transparent pixel is removed; above it, it becomes opaque (DTF doesn't print "halfway"). Trim transparent edges and Remove small specks and fill small holes complete the clean-up.
Leave the Width empty to keep the file size, or enter it in cm. Preview background (never in the file) lets you check the result on a checkerboard, white, black or the colour of your choice. Exporting the transparent 300 ppi PNG costs 1 token.
Gang sheet
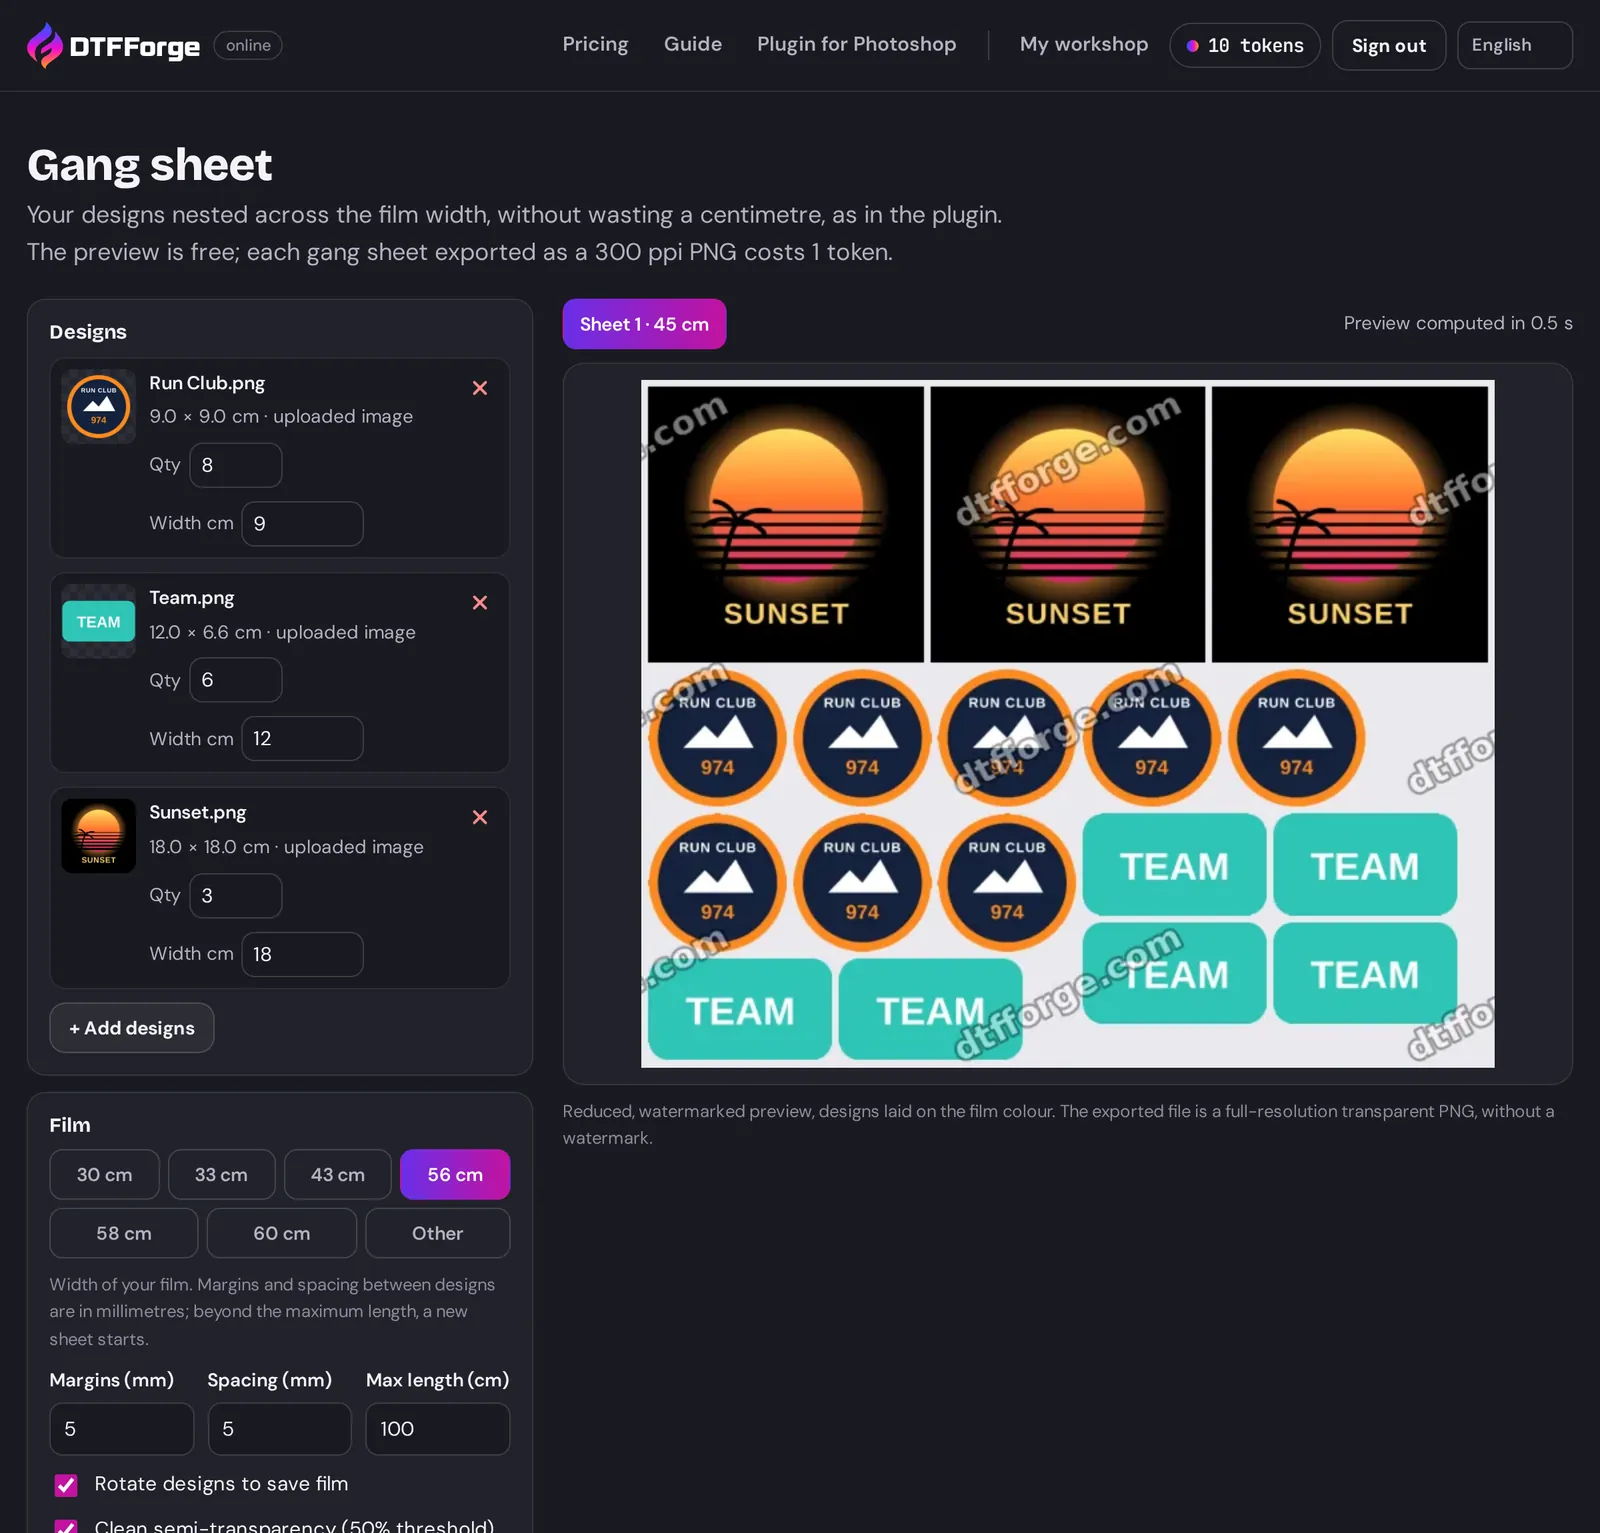
Nests your designs across your film width to waste as little film as possible, like the plugin's Gang sheet builder module.
- Click + Add designs: choose from your uploaded images and your files already exported (Halftone, background removal), or upload a new image.
- For each design, enter the quantity and, if needed, the width in cm (otherwise, the file size).
- Under Film, choose the film width (30 to 60 cm, or Other), the Margins (mm), the Spacing (mm) between designs and the Max length (cm): beyond it, a new sheet starts.
- Tick Rotate designs to save film to save film. The summary line gives the number of sheets, the metres of film, the number of copies and the fill rate.
- Export each sheet: 1 token per sheet, as a transparent 300 ppi PNG at your film width. They appear in My exported sheets.
At most 30 different designs and 500 copies per gang sheet order. A design too large for the film width is flagged: reduce its width.
Client proof
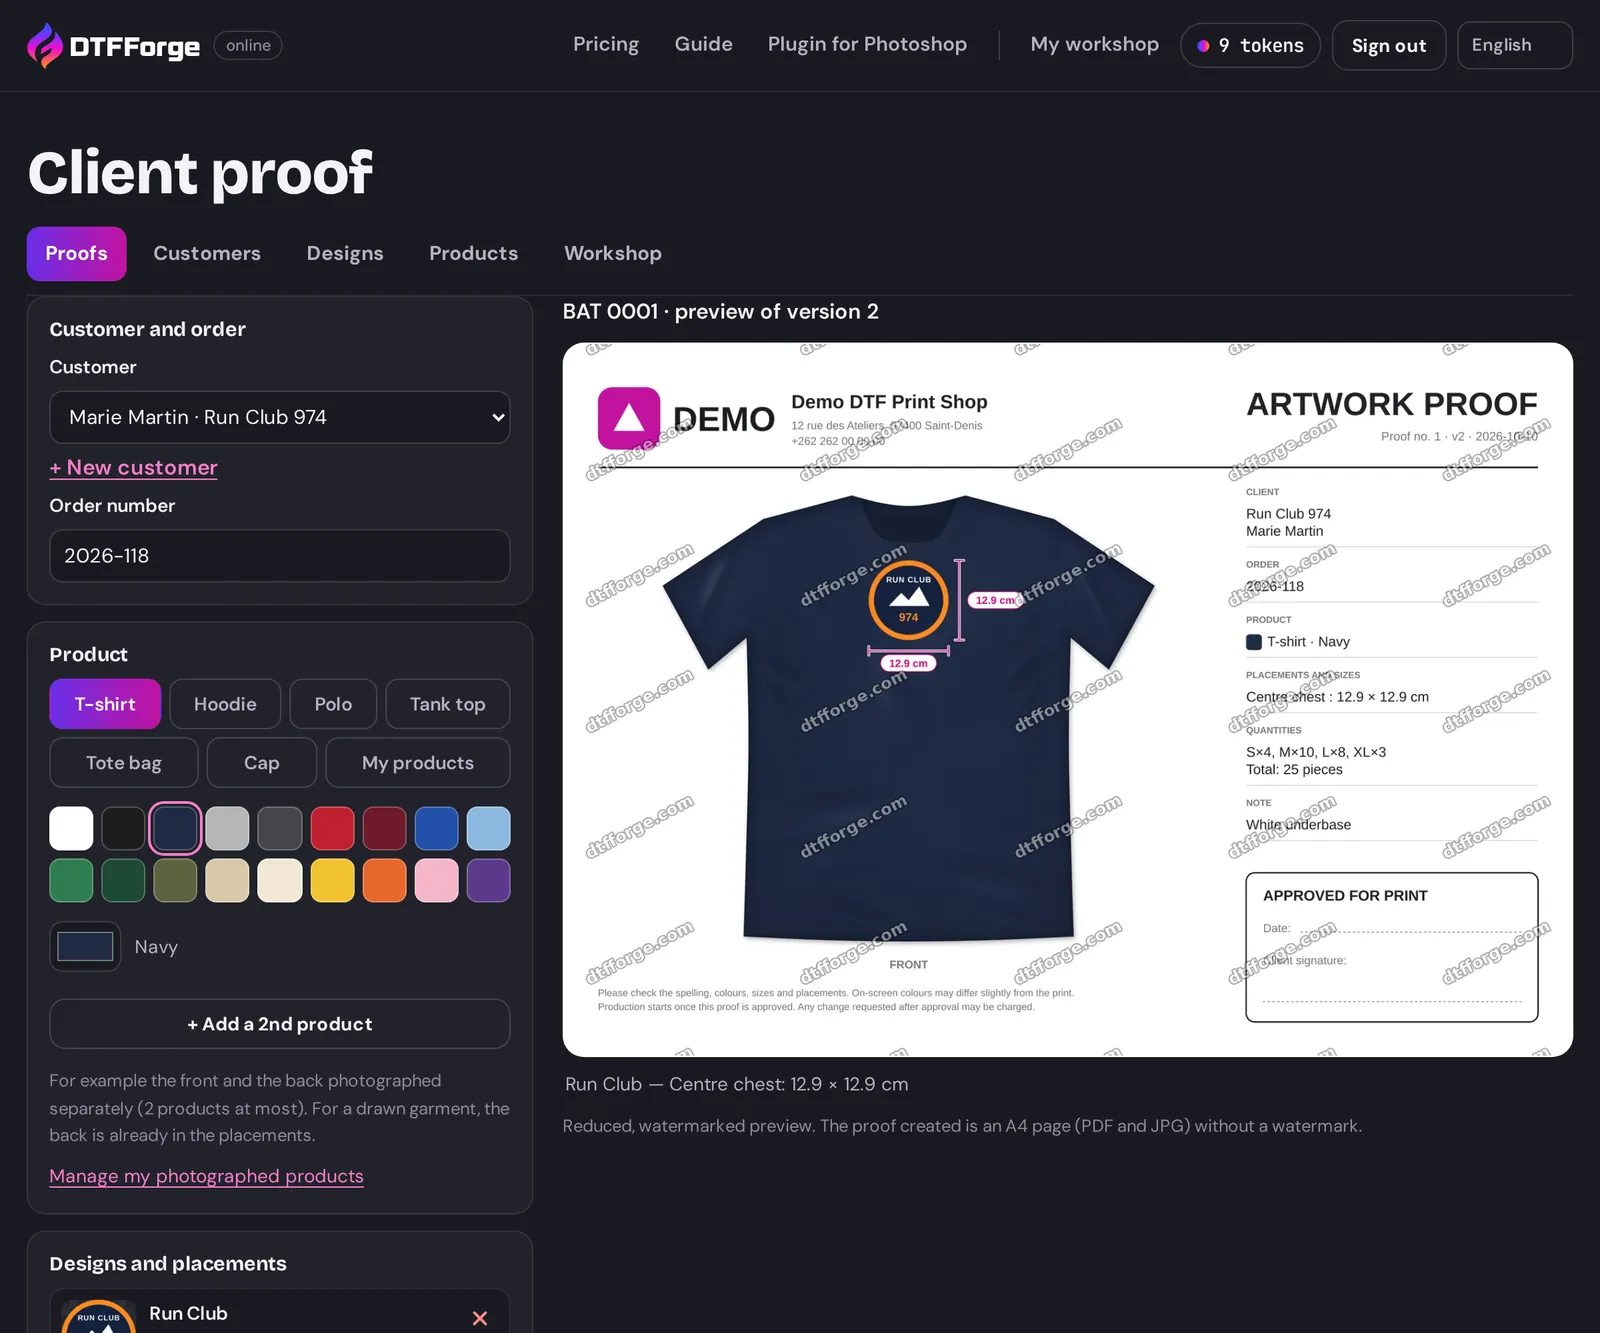
The A4 proof with the product mock-up, dimensioned designs, quantities and an approval box, approved by your customer online. The tool has five tabs: Proofs, Customers, Designs, Products and Workshop.
- Click New proof. Under Customer and order, choose the customer or create one with + New customer, and enter the order number.
- Under Product, choose a drawn garment (T-shirt, Hoodie, Polo, Tank top, Tote bag, Cap) and its colour, or My products for your own photos. + Add a 2nd product adds, for example, the back photographed separately (2 products at most).
- Under Designs and placements, click + Add a design: choose a design from the library or add one from your images or exported files (a PNG with a transparent background gives the best result). Set its width and placement (Left chest, Centre chest, Back…).
- Fill in the Quantities (for example S×2, M×5), the Note and the Document language.
- Click Create the proof: the version is created (A4 PDF and JPG, without watermark) for 1 token. Each new version also costs 1 token; the preview stays free.
Sending to the customer
Copy the Approval link, send it by e-mail or WhatsApp, or open the customer page to see it as they will. The proof status follows the answer: Draft, Awaiting customer, Approved or Changes requested. New link replaces the link (the old one stops working). Every version can still be downloaded as PDF and JPG.
Approval by your customer
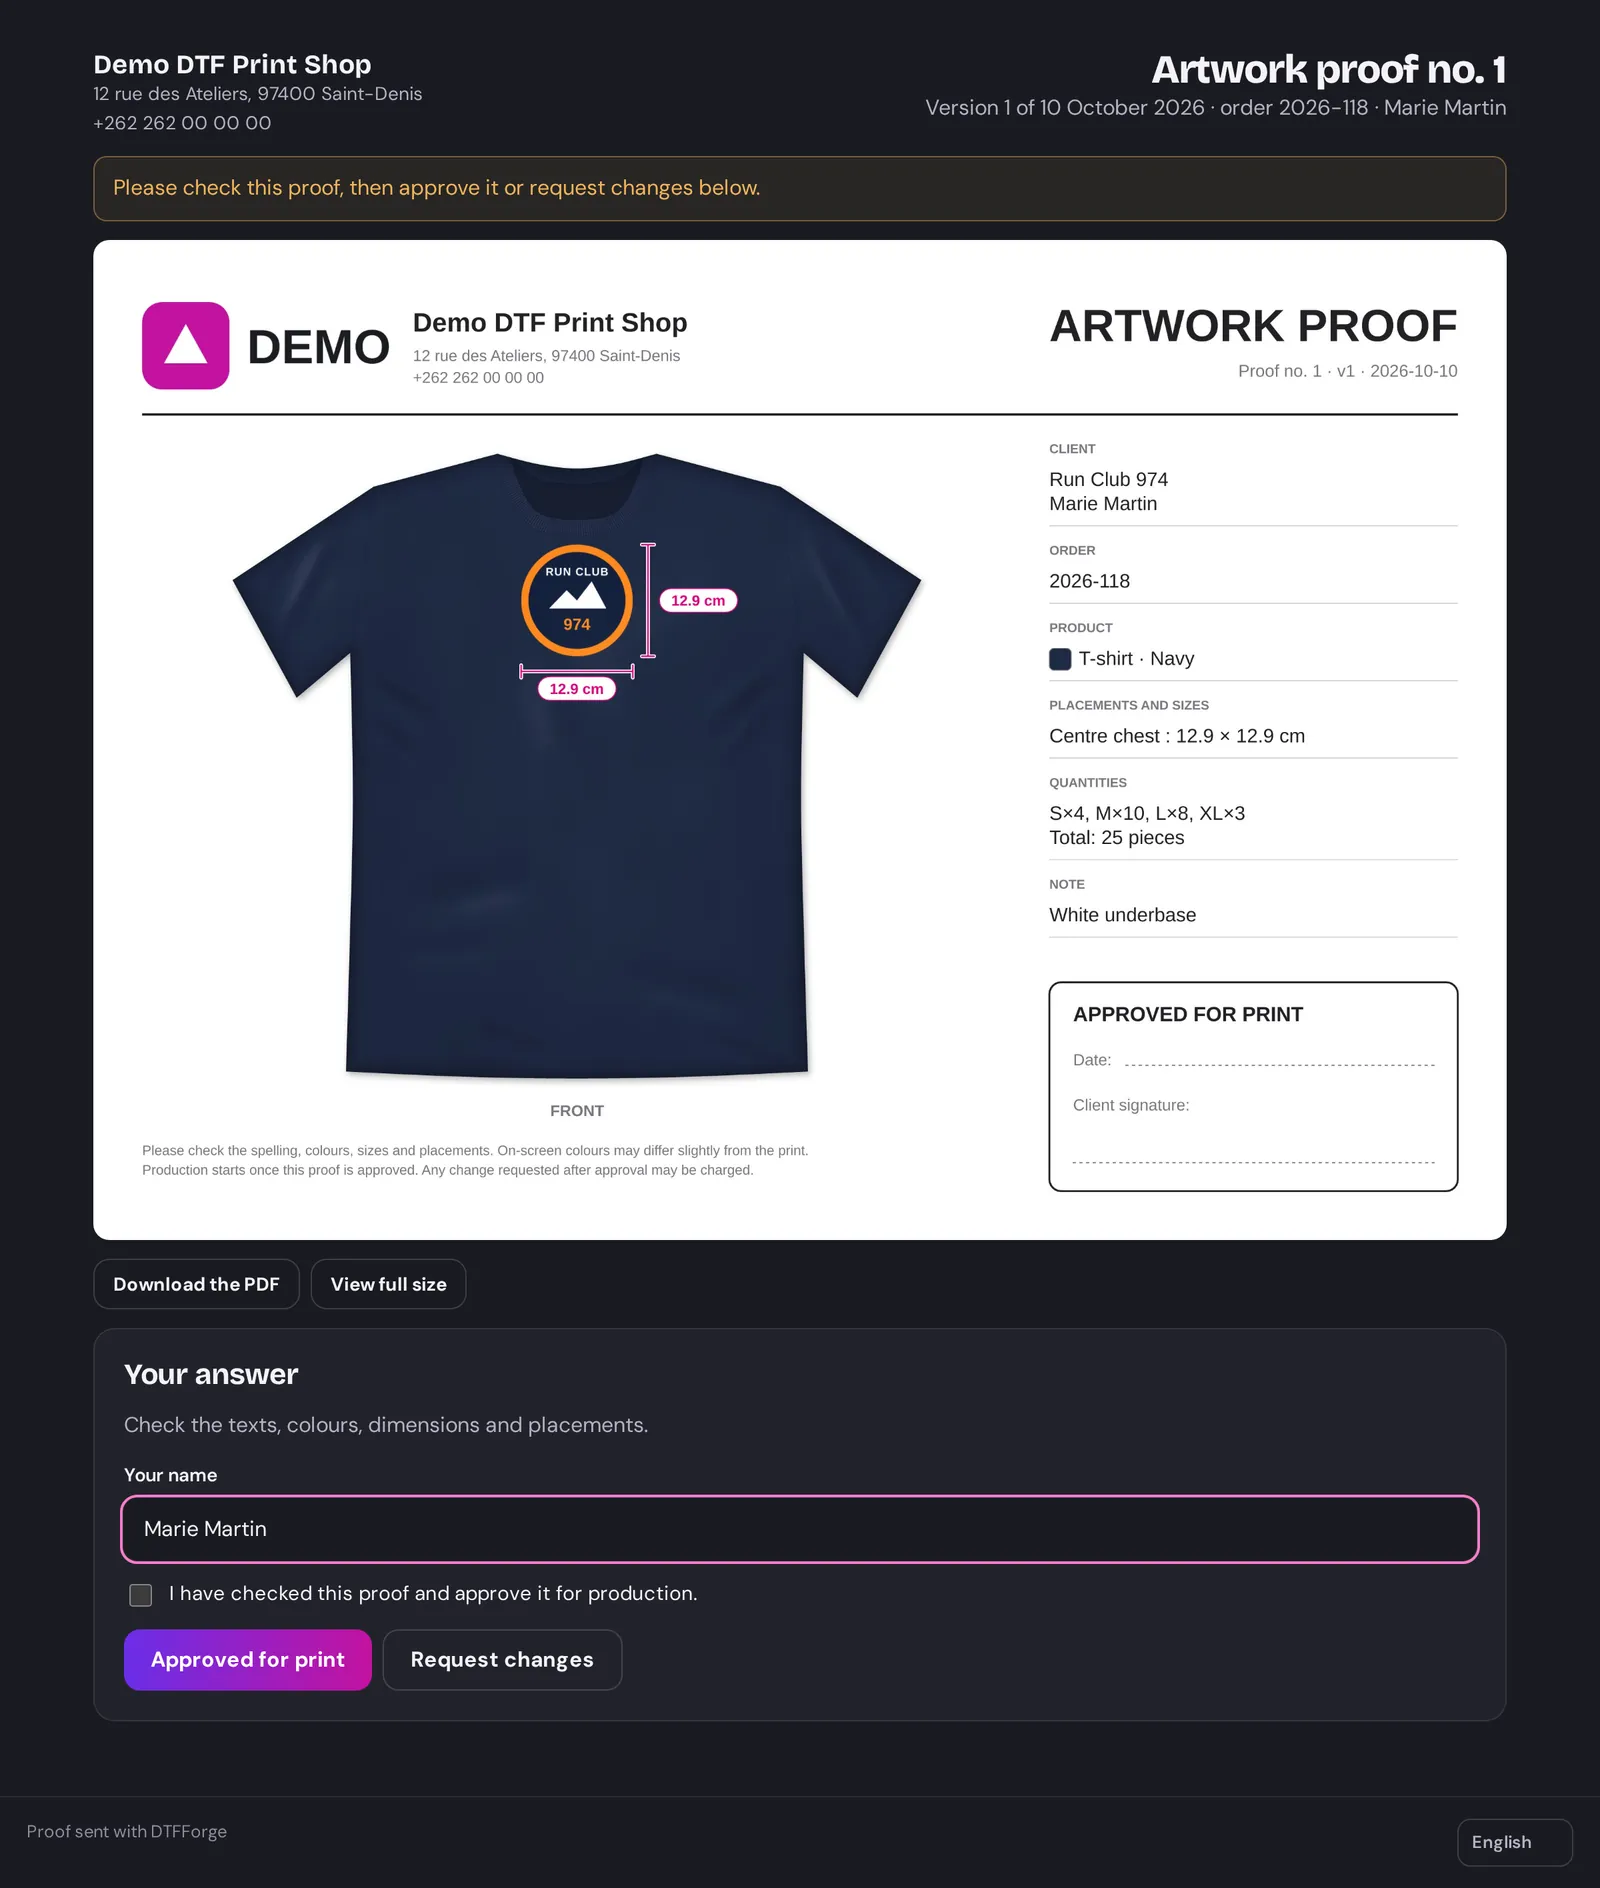
Your customer needs neither an account nor a password: they open the link and always see the latest version of the proof.
- They can view it full size and Download the PDF.
- To approve, they enter their name, tick the confirmation box and click Approved for print.
- Otherwise, they click Request changes and describe what needs to change.
You get an e-mail with every answer. After a change request, create a new version: your customer sees it at the same address. The page is shown in the language of the proof, and the customer can switch language.
Customers and designs
- Customers: each customer's record (name, company, e-mail, phone, address, company number, VAT number, notes) with the history of their proofs. The New proof for this customer button creates a proof already filled in. Search covers name, company, e-mail and phone.
- Designs: the library of your customers' designs, kept for their next proofs. Transparent margins are trimmed and the suggested width comes from the file's resolution; you can change it.
Your customers, designs and proofs stay in your account until you delete them. Deleting a customer also offers to delete their proofs; their designs stay in the library.
Photographed products
To show the design on the real product: a T-shirt of a specific brand, an apron, a bag…
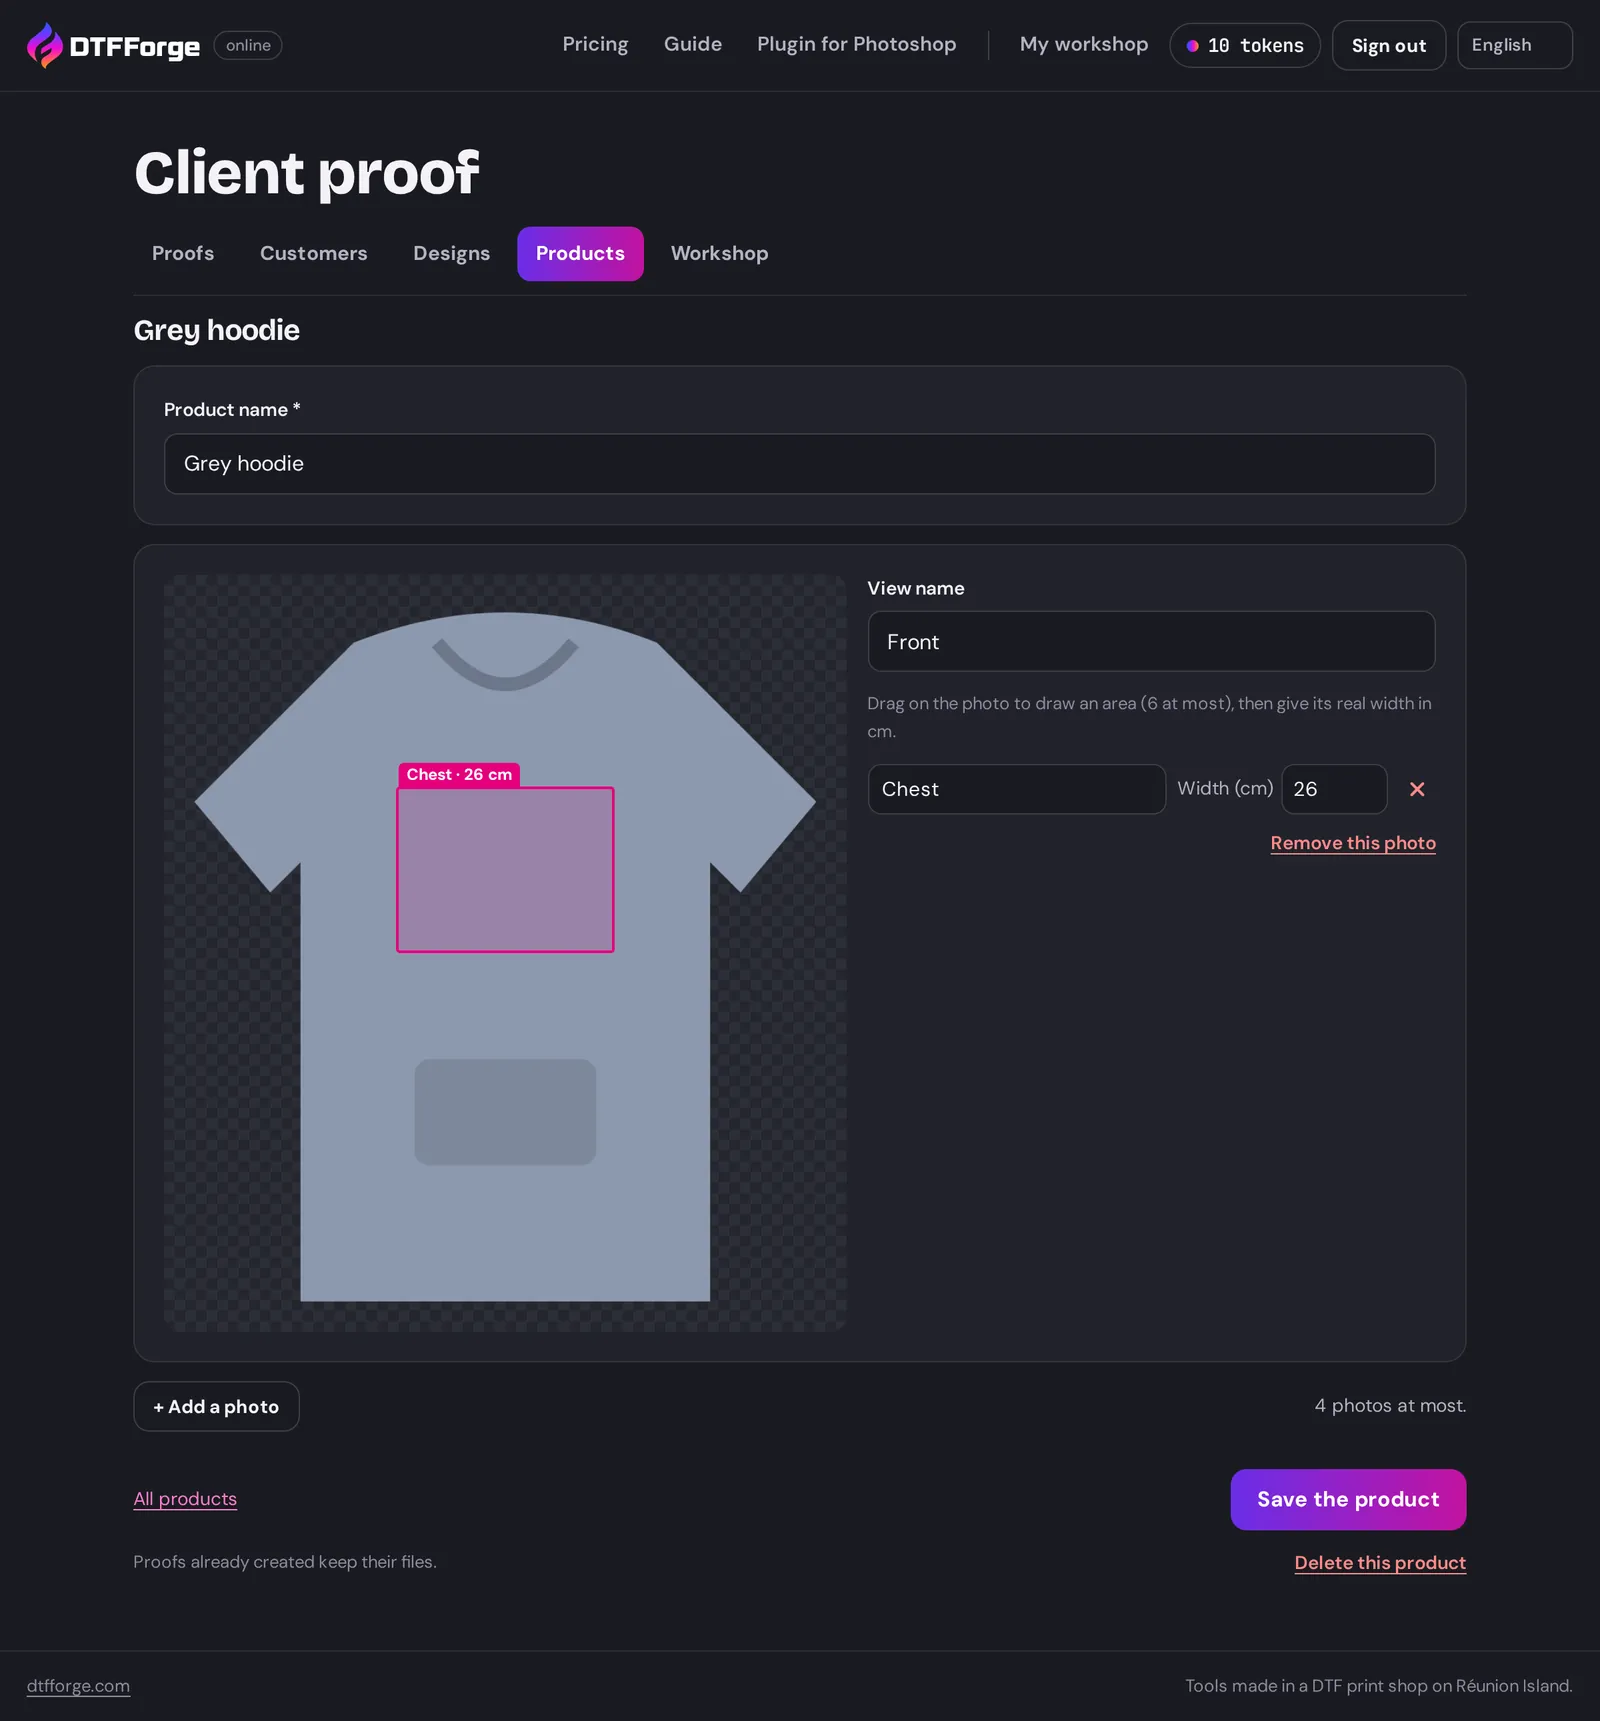
- In Products, click New product and give the product a name (for example "Black B&C T-shirt").
- + Add a photo: a photo of the blank product, from the front, ideally a PNG with a transparent background. Up to 4 photos (front, back…), each with its view name.
- Drag on the photo to draw a print area (6 at most per photo), give it a name and its real width in cm: the design will be placed on it to scale.
- Click Save the product. The product appears under My products when you create a proof.
The header of your proofs
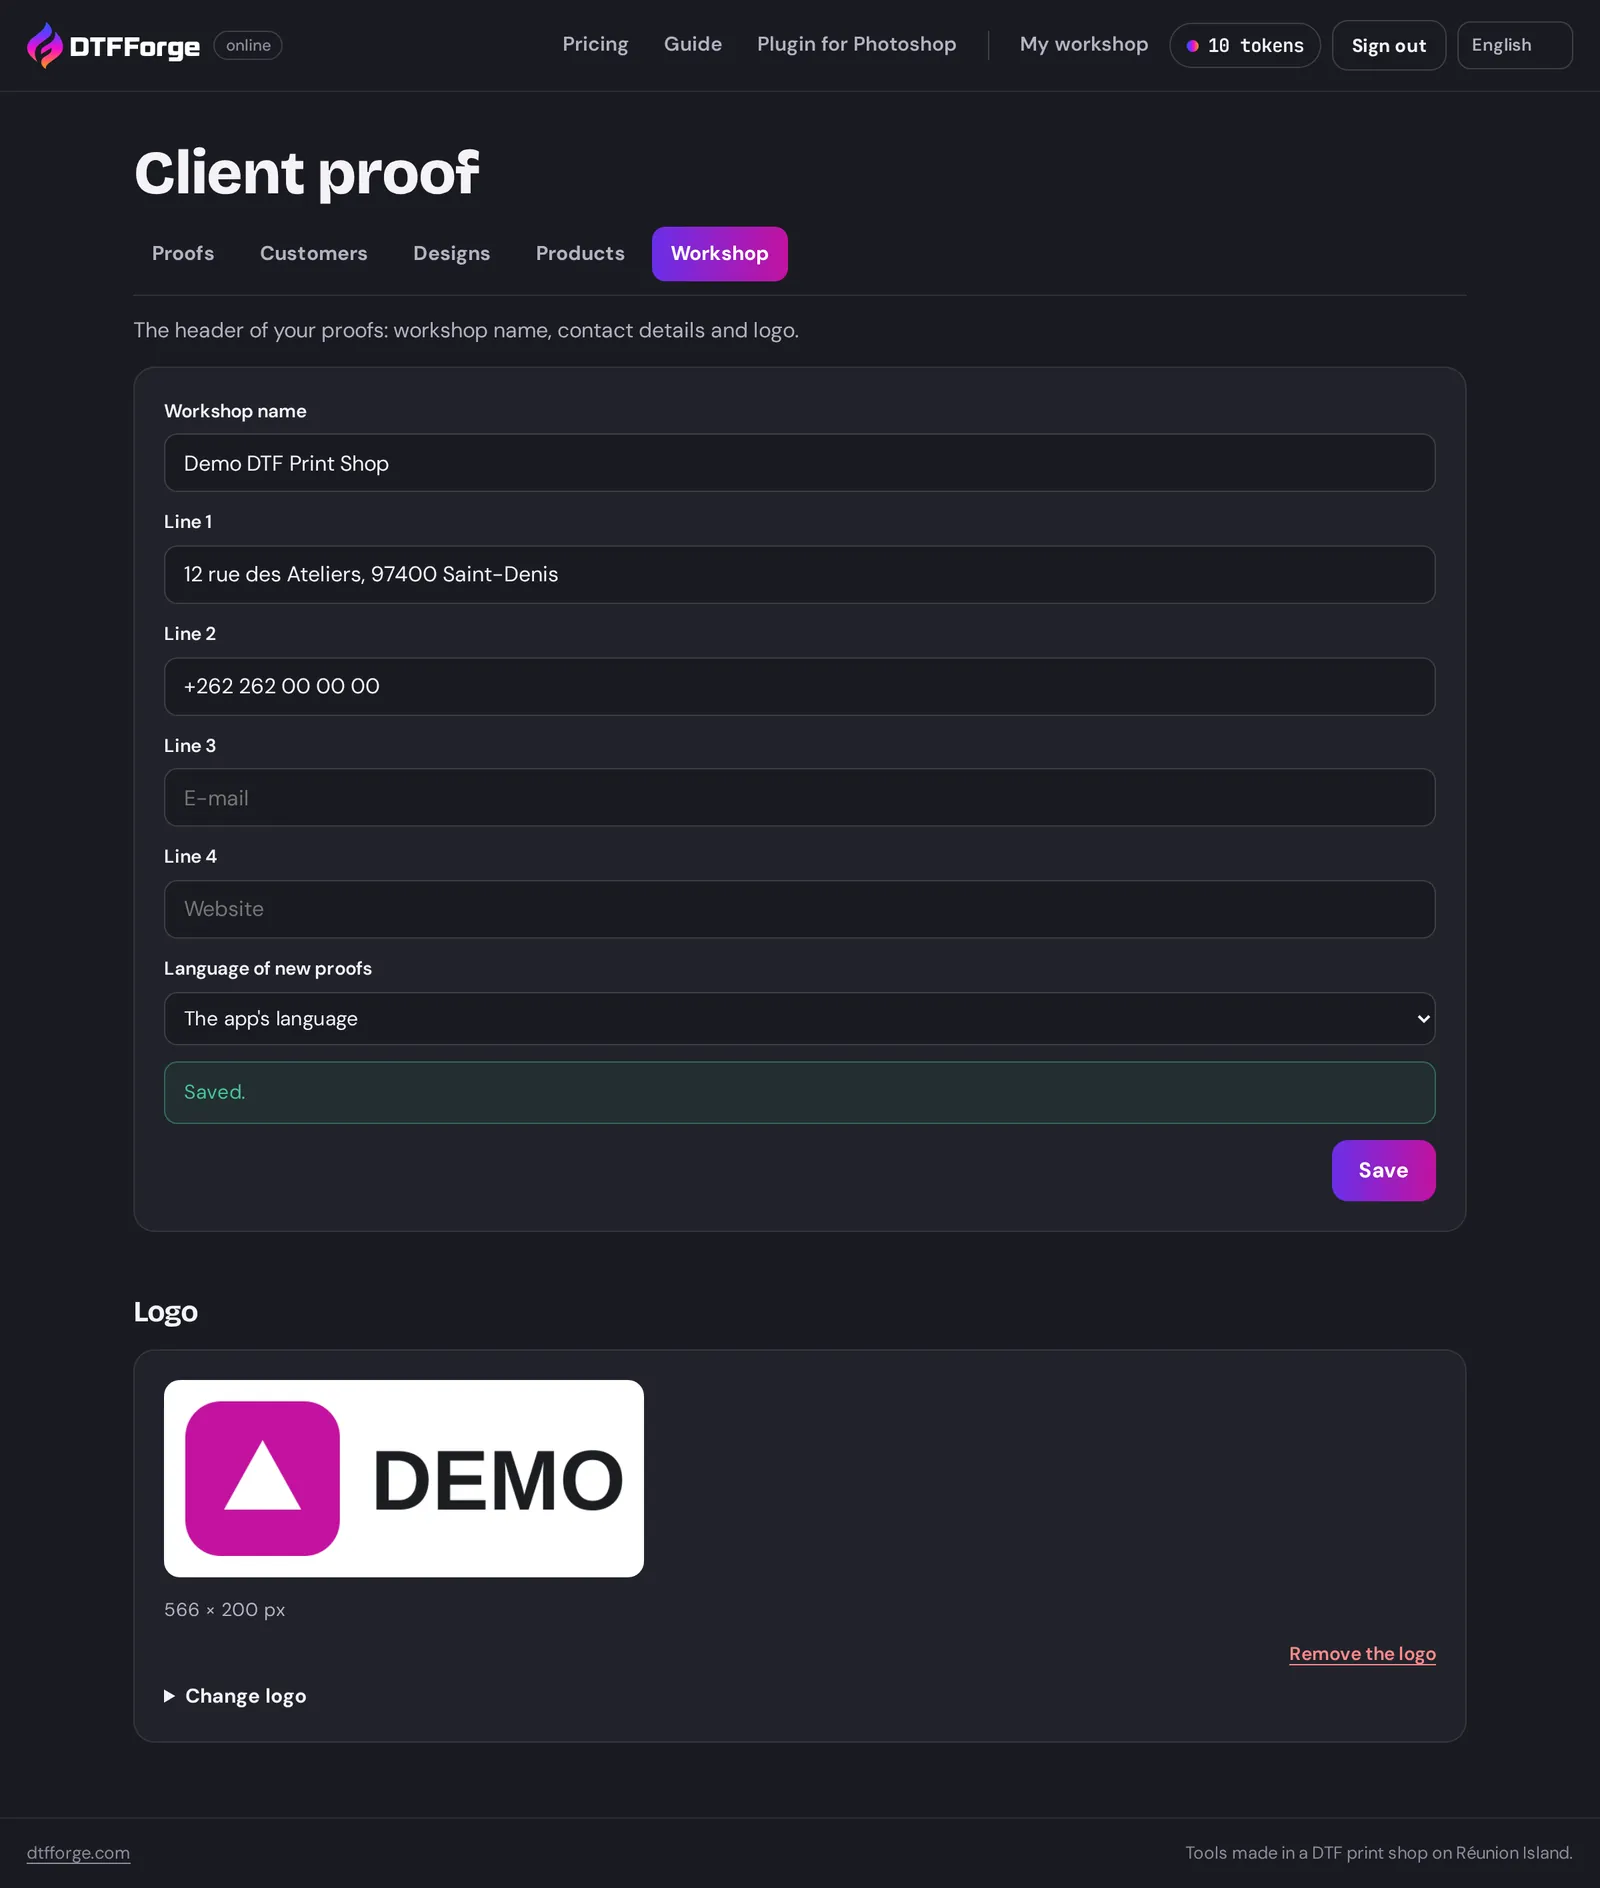
In the Workshop tab, enter the Workshop name, up to four lines of contact details (address, phone, e-mail, website) and your Logo (ideally a transparent PNG). They appear at the top of every proof and on your customer's page.
Language of new proofs: the language of new proofs, if your customer doesn't speak the same language as you. It can also be changed proof by proof.
Frequently asked questions
"Not enough tokens"
The export needs 1 token. Open Tokens to choose a subscription or a pack; your settings stay in place.
"This image is no longer available"
It is more than 7 days old or has been deleted. Upload it again: it's free.
Is the exported file watermarked?
No. Only the preview is scaled down and watermarked; the exported file is full resolution, without watermark.
My image is blurry once enlarged
The app tells you when the resolution drops below 300 ppi at the requested size. Reduce the print size, or start from a larger file.
Can I use the app on my phone?
Yes, every screen adapts. To fine-tune a Halftone or a gang sheet, a larger screen is still more comfortable.
A question, a problem?
Write to us at contact@dtfforge.com: we answer in English and French.