
User guide
Everything you need to install DTFForge, activate your licence and go from the customer's file to a RIP-ready TIFF. Button names are the ones shown in the panel.
Installing the plugin
Requirements: Adobe Photoshop 2023 (version 24.2) or newer, on Windows or macOS, with the Creative Cloud desktop app installed and signed in to your Adobe account.
- Download the .ccx file from the Download page.
- Double-click it. The Creative Cloud app opens and asks you to confirm: click Install. Creative Cloud may warn that the plugin does not come from the Adobe Marketplace: this is normal for a plugin sold directly by its publisher.
- In Photoshop, open the Plugins → DTFForge menu. The panel opens; you can dock it wherever you like, just like any other Photoshop panel.
On first launch, a welcome card sums up how the plugin works. The ? button at the top of the panel shows help for the open tab at any time, with a Full online guide ↗ link that opens this guide at the right section.
The panel has three tabs: Prepare (checking and preparing the file), Gang sheet (gang sheets and finishing for the RIP) and Export (batch processing and checking a TIFF).
Update
Download the new version and double-click it: it replaces the old one. Your licence and settings are kept.
Uninstall
In the Creative Cloud app, go to plugin management, then open the … menu next to DTFForge → Uninstall.
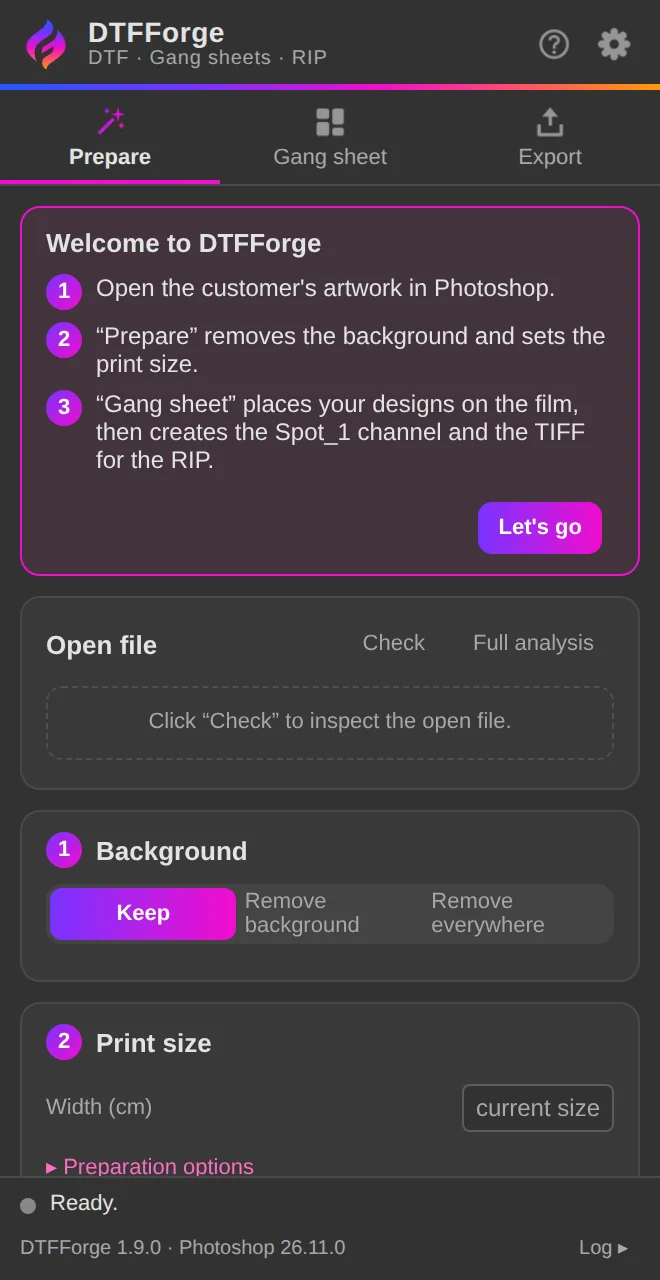
Licence and free trial
Everything is done from the gear icon at the top of the panel (Settings), in the Licence section.
7-day free trial
Click Free trial (7 days), enter your e-mail, then click Start the trial. Every module is unlocked for 7 days, no credit card needed. One trial per computer, and at most two computers per e-mail address. When the trial ends, only the Checker (free) and the modules you have bought stay active.
Activate your key
After payment, your key (format ISD-XXXX-XXXX-XXXX) is shown on screen and sent to you by e-mail. Paste it into the field in the Licence section and click Activate. Lower-case letters and spaces are accepted.
Two computers per licence
A licence can be active on two computers at the same time, for example a desktop and a laptop. To switch computers, click Release this computer on the old one, then activate the key on the new one. If the old computer is no longer available, write to us at contact@dtfforge.com.
Offline use and checks
An internet connection is needed to activate the licence or the trial. After that, the plugin works offline for up to 30 days; it checks the licence in the background, at most once a day. The Check now button forces a check.
Buy another module
Pay with the same e-mail address: the module is added to your existing key. In the plugin, click Check now to unlock it. Your key does not change.
Modules that are not activated stay visible but greyed out, with a bar saying so and a Modules button that opens the settings.
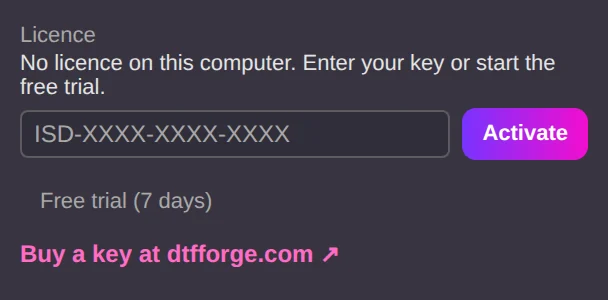
Settings and panel language
The gear icon opens the settings shared by all modules:
- Print resolution (dpi): 300 by default. All designs are prepared at this resolution.
- Film width (cm): the width of your film roll (56 cm by default). It is used to check files and to build gang sheets.
- Panel language: Auto follows Photoshop's language (English if Photoshop is set to a language the panel does not offer). Choose FR, EN, ES, PT, DE or IT to override it; the change takes effect immediately.
- Output folder: the folder where DTFForge saves PNG and TIFF files. You are asked for it the first time; Change… lets you choose another one.
- Modules: the status of each module on this computer (free, activated, trial or not activated).
The names of generated files follow the panel language (for example SHEET_…_1of2_87cm.tif).
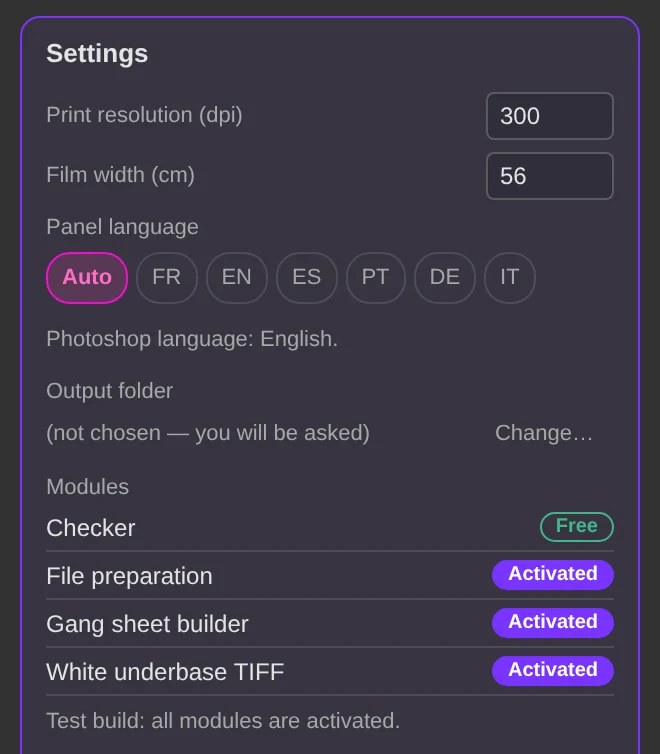
Checker (free)
The Checker is included free of charge and works without a licence. It never modifies your file.
Check the open file
In the Prepare tab, on the Open file card:
- Check instantly inspects the colour mode (RGB expected), bit depth (8 bits), resolution compared with your setting, print size, whether the design fits the film width, any opaque background, whether the Spot_1 channel is present and the number of layers.
- Full analysis also reads the pixels: the proportion of semi-transparent pixels and of opaque white, and the ink coverage.
Each item is green (OK), orange (to review) or red (blocking), with an explanation underneath.
Check a TIFF before the RIP
In the Export tab, on the Check a TIFF before the RIP card, click Choose a TIFF…: DTFForge reads the file without opening it in Photoshop and shows its size, resolution, mode, compression, transparency and spot channels. It confirms that the channel your RIP expects, as named in Channel name (RIP), is present.
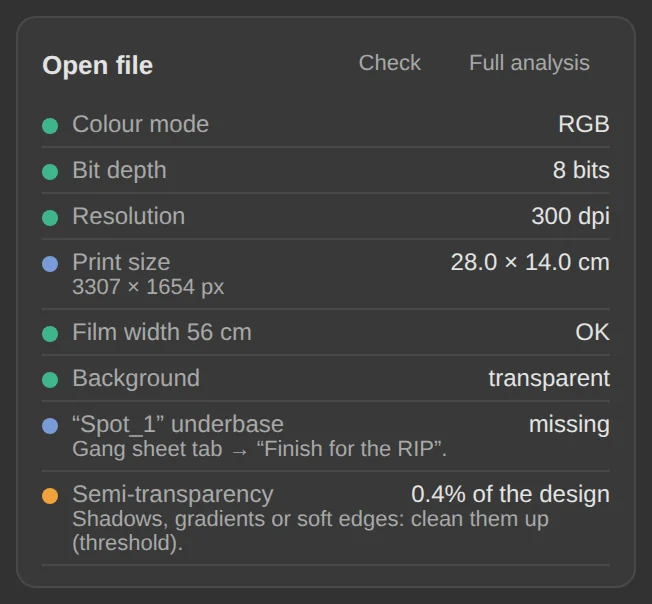
File preparation
Use the Prepare tab. Open the customer's artwork in Photoshop, set the background and size, then click Prepare for DTF. A single Ctrl+Z undoes everything.
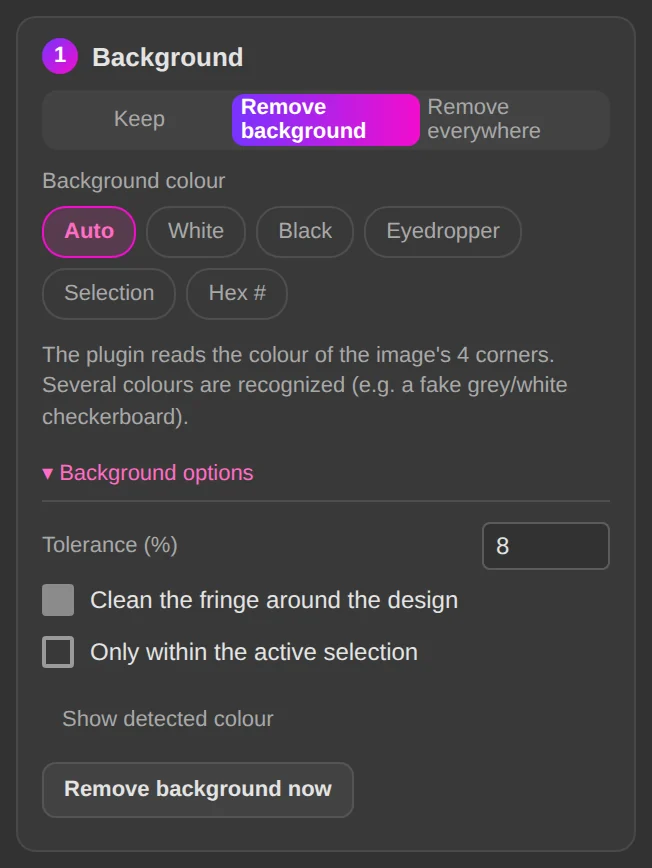
① Background
- Keep: the background is left untouched.
- Remove background: removes the background colour, starting from the edges of the image. Areas of the same colour inside the design are kept.
- Remove everywhere: removes that colour everywhere, including inside letters or the design.
Background colour:
- Auto reads the four corners of the image; it can detect several colours (for example a fake grey and white checkerboard).
- White and Black for a plain background.
- Eyedropper: pick the Eyedropper tool (I key) and click the image background; the foreground colour is used.
- Selection: select part of the background (rectangle, lasso, magic wand…); all its colours are removed.
- Hex #: enter the hex code, for example #1F2A44.
Under Background options you will find Tolerance (%), set to 8% by default (increase it if traces of the background remain), Clean the fringe around the design and Only within the active selection. Show detected colour shows the colours found; Remove background now removes the background from the active layer without flattening the document.
② Print size
Enter the Width (cm) you want on the garment. If left empty, the design keeps its current size. The file is resampled to the resolution set in the settings; if the source image is too small (an actual resolution below 150 dpi), the report warns you that the print may be blurry.
Under Preparation options:
- Convert to 8-bit RGB: recommended, as this is the format DTF expects.
- Clean semi-transparency, threshold (%): 50% by default. Pixels more transparent than the threshold are deleted, the others become opaque. Semi-transparent pixels print poorly in DTF (shadows, soft edges).
- Trim transparent edges: the canvas is trimmed to fit the design.
Prepare and save
Prepare for DTF converts to 8-bit RGB, flattens the layers, removes the background, trims, resizes and cleans up semi-transparency, all in a single history step. The report details what was done, then the Checker inspects the result.
Save as PNG… saves a PNG copy to your output folder, with its size in the name (for example logo_10-0x6-4cm.png).
Gang sheet builder
Use the Gang sheet tab. DTFForge nests your designs across the film width to use as little film as possible.
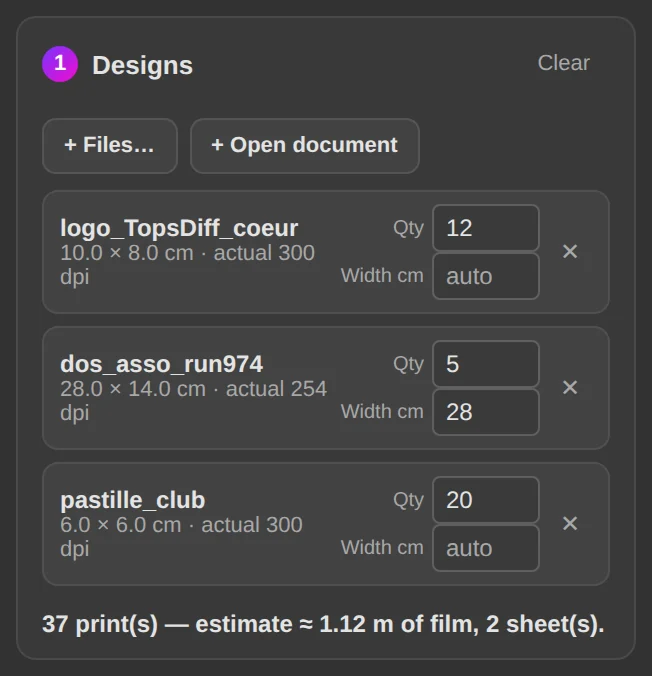
① Designs
Add files with + Files… (PNG, PSD, JPG, TIF…) or the open document with + Open document. For each design, set the quantity (Qty) and, if needed, the print width (Width cm); if left empty, the size is read from the file.
The list shows the size and actual resolution of each design (in orange below 200 dpi). A design wider than the film will be rotated 90°; if it does not fit either way, enter a smaller width. The estimate underneath gives the number of prints, the metres of film and the number of sheets.
② Settings
- Edge margin (mm) and Gap between designs (mm): 5 mm by default.
- Max sheet length (cm): 100 cm by default; beyond that, a new sheet is created.
- Rotate designs to save film: allows designs to be rotated for a better fill.
- Clean semi-transparency: the same clean-up as in Prepare.
- Also remove the background (Prepare settings): also removes the background of each design (requires the File preparation module).
- Label in the margin (optional): a line of text (for example the customer's name) printed in the top margin, along with the date and the sheet number.
Build
Build gang sheet creates the sheet or sheets in Photoshop, at the film width, then crops them to the length actually used. The report shows the length of each sheet, the total film used and the fill rate. If the calculation comes to more than three sheets, or finds a design that is too large, DTFForge asks you to confirm: check the widths, or click again within 30 seconds.
Export as PNG… saves the sheets as PNG; Close sheets closes the built sheets without saving them. To print, move on to step ③ below.
White underbase TIFF: Finish for the RIP
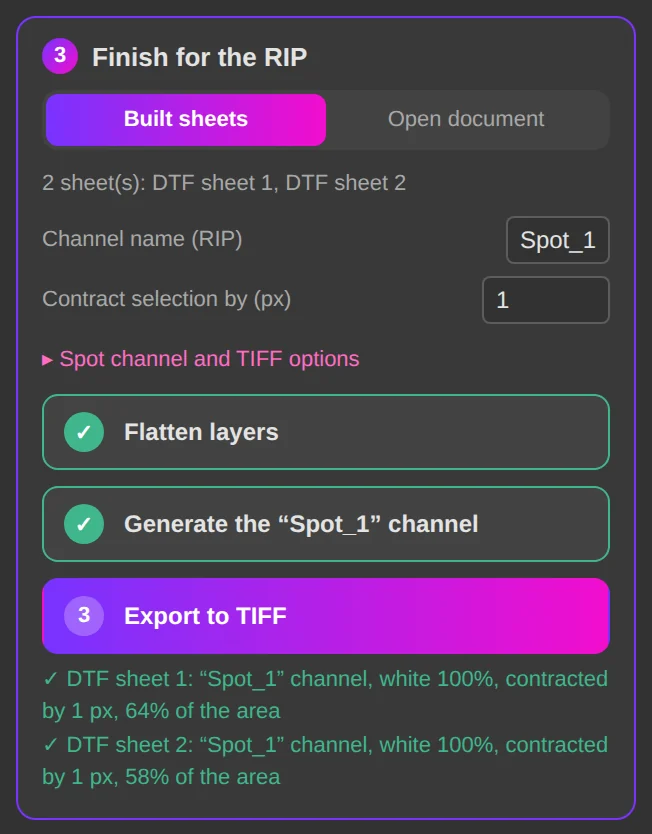
The ③ Finish for the RIP card, at the bottom of the Gang sheet tab, turns the sheet into a TIFF with the white underbase channel your RIP expects.
Choose what to work on: Built sheets (those from the last build) or Open document (any document, for example a sheet laid out by hand).
- Channel name (RIP): the channel name your RIP expects, Spot_1 by default (some RIPs expect White: check your RIP's documentation).
- Contract selection by (px): 1 px by default. The white channel is shrunk slightly so that it does not stick out around the colours.
- Under Spot channel and TIFF options: Solidity (%), set to 100%, and TIFF LZW compression.
Then click the three steps, in order. Each one is ticked once done:
- Flatten layers: the visible layers are merged into a single transparent layer. An opaque background must be hidden or deleted first.
- Generate the “Spot_1” channel: DTFForge selects the visible pixels (like a Ctrl+click on the layer thumbnail), contracts the selection, creates the white spot channel and fills it. An existing channel with the same name is replaced. All channels remain visible and selected.
- Export to TIFF: a TIFF copy (with no layers, but with the spot channel and transparency) is saved to your output folder, for example SHEET_Customer_2026-09-25_1of2_87cm_Spot_1.tif. DTFForge then reads the file back to confirm that the channel is present.
All that is left is to load the TIFF into your RIP.
Export: batch processing
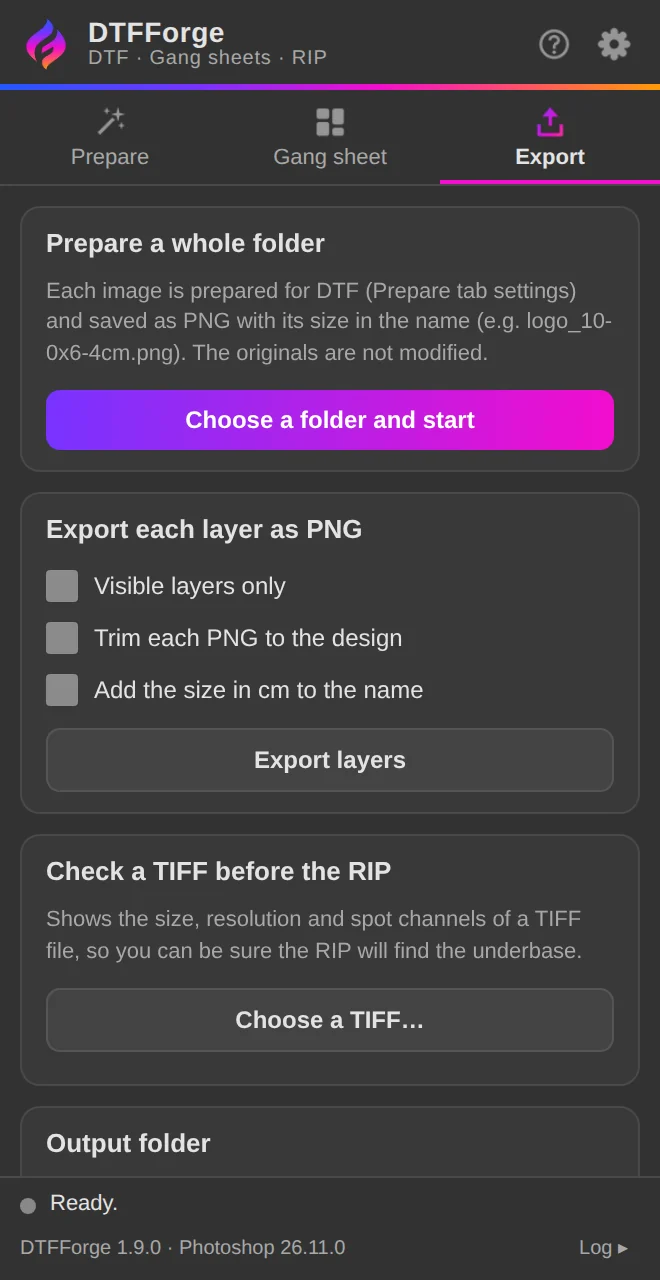
Prepare a whole folder
Choose a folder and start applies the Prepare tab settings (background, clean-up, resolution) to every image in a folder (PNG, JPG, PSD, TIF, WebP…) and saves them as PNG, with their size in the name, to your output folder. The originals are not modified and each image keeps its size: the width set in Prepare is not applied. Requires the File preparation module.
Export each layer as PNG
Creates one PNG per layer of the open document. Options: Visible layers only, Trim each PNG to the design and Add the size in cm to the name. Then click Export layers.
Check a TIFF before the RIP
See the Checker section.
Troubleshooting
- Double-clicking the .ccx file does nothing.
- Make sure the Creative Cloud app is installed and signed in to your Adobe account, then try again. If it still fails, write to us.
- The panel does not appear in Photoshop.
- Open the Plugins → DTFForge menu. You need Photoshop 2023 (24.2) or newer; restart Photoshop after installing if needed.
- A message says that Photoshop is too old or that the Imaging API is missing.
- Background removal and pixel clean-up use a recent Photoshop feature: update Photoshop from the Creative Cloud app.
- A module is greyed out and marked “not activated”.
- Activate your key or start the free trial (gear icon → Licence). Right after a purchase, click Check now.
- The licence is already active on the maximum number of computers.
- Click Release this computer on the other computer. If it is no longer available, write to us with your receipt.
- The free trial has already been used.
- The trial is limited to one per computer. Write to us if you need more time to test.
- The plugin asks you to connect to the internet.
- If the licence has not been checked for 30 days, or if the computer's clock has gone back, connect to the internet, then click Check now.
- The RIP does not print the white.
- The name in Channel name (RIP) must exactly match the one your RIP expects. Check the file with Check a TIFF before the RIP.
- White shows around the colours on the print.
- Increase Contract selection by (px) to 2 px instead of 1, and clean up semi-transparency.
- An error message mentions a step.
- The message names the step concerned. Open the Log at the bottom of the panel for details, then send us a screenshot of the message and the log.
Any other questions? Write to us at contact@dtfforge.com, ideally with a screenshot of the panel.