
Screen a design for DTF, right inside Photoshop
Halftone turns gradients, shadows and photos into solid dots: what prints well in DTF. By hand, it is a dozen steps to repeat for every file. With DTFForge, it is one tab, a few sliders and a live preview.
Why screen for DTF
DTF ink has no half measures: a pixel is printed with its white underbase, or it is not. Partial transparency therefore gives a white haze, and large solid areas give a stiff transfer that you can feel under your hand and that cracks over time.
Screening replaces the shades with dots of varying size on a transparent background. From a distance, the eye rebuilds the gradient; to the touch, the shirt breathes between the dots. It is the screen printer's technique, adapted to DTF: a lower ruling (powder does not hold on a dot that is too small) and a knockout of the fabric colour.
The DTFForge Halftone, step by step
- Choose the colour to remove
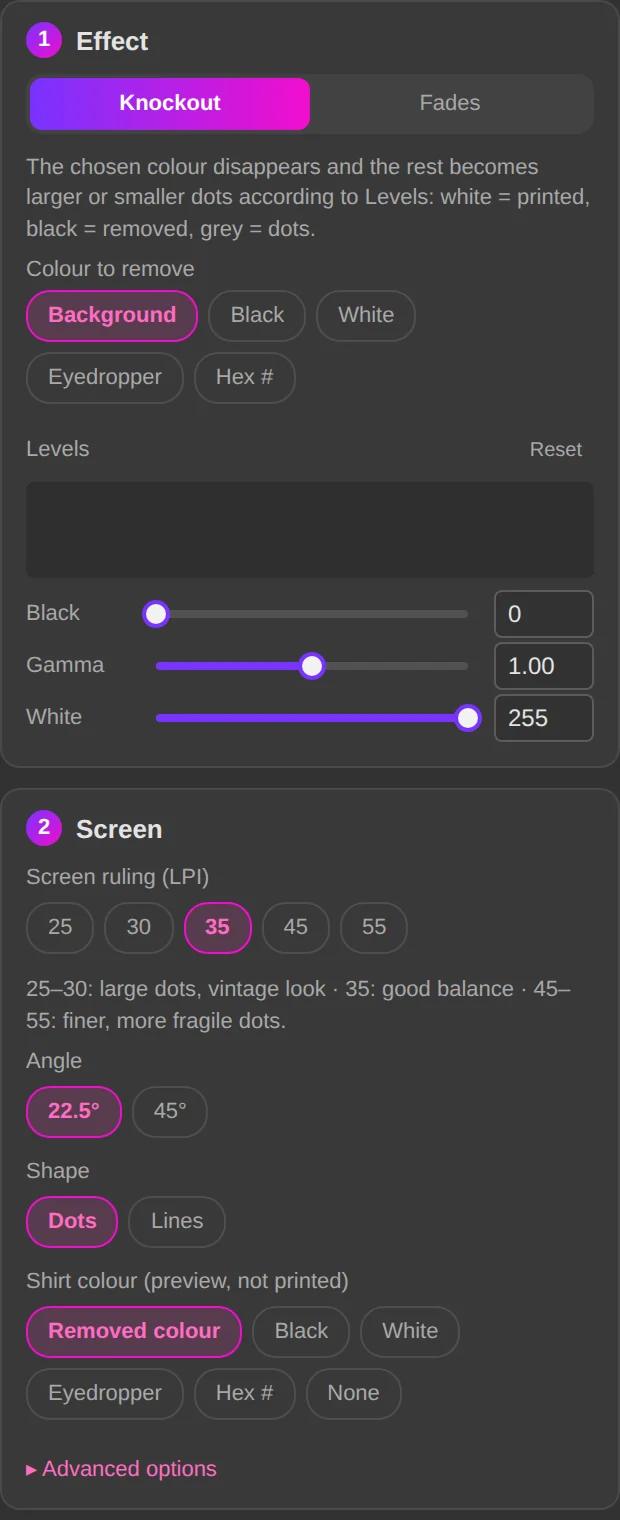
In the Halftone tab, Colour to remove: black, white, eyedropper or hex code. That colour becomes transparent, solid or faded. On an image that is already cut out, DTFForge removes nothing and screens only the fades.
- Set the levels as in Photoshop
The Levels have the same histogram and the same three triangles as Photoshop. White = printed solid, black = transparent, grey = dots. Move the grey triangle to the left to print more, to the right to leave more fabric.
- Ruling, angle, shape, minimum dot
Screen ruling (LPI) from 25 to 55 (35 by default), Angle at 22.5°, Shape round or lines. The Minimum dot (mm) removes dots that would not hold the powder, taking the choke of the white channel into account.
- Live preview, then apply
Every setting updates the image, on the shirt colour of your choice (preview only, not printed). Apply keeps the original hidden underneath: nothing is lost. The screened design then goes onto the gang sheet as is, dots intact.
The Halftone module in the guide →
What you get
- Gradients and photos that print without white haze
- A softer hand: up to 70% less solid area on a fade
- A vintage or a fine look, your choice, with the same settings from one file to the next
- The white channel generated dot by dot afterwards in the Gang sheet tab, with no retouching
Frequently asked questions
Do I have to screen the whole image?
No. Flat areas stay solid: only the areas of the removed colour and the semi-transparent areas become dots. A logo with a drop shadow keeps its sharp colours; only the shadow is screened.
My RIP already does a screening
The RIP screens the ink to reproduce colours, not to decide where the white underbase goes. The DTFForge Halftone acts before: it creates the dots in the file, and the white channel follows exactly those dots. The two complement each other.
What about a knockout on a colour other than black?
Pick the shirt colour with the eyedropper or type its code. DTFForge removes it from the design (colour difference) and screens the rest. The Shirt colour (preview, not printed) shows you the result on that colour.
Screen your first design today
The Halftone module costs €49, one-time payment, lifetime licence. The 7-day free trial unlocks every module, and the same halftone exists online, without Photoshop.