
The black box behind your DTF transfer
A black rectangle printed around the design: it does not breathe, it wastes ink and film, and it never quite matches the black of the shirt. It is not the printer. It is the file.
Why a black box prints
A DTF transfer prints everything in the file that is not transparent. A JPG has no transparency: the black, white or coloured background the customer drew their logo on is printed as is, with a white underbase beneath it. The result is an opaque block, a surface glued onto the fabric and a "file black" that clashes with the black of the shirt.
Removing the background by hand in Photoshop (magic wand, eraser, mask) takes time and often leaves a dark fringe around the design, where the edge pixels mix the colour of the artwork with the colour of the background. That fringe prints too.
Remove the background in one click with DTFForge
- Open the customer's file in Photoshop
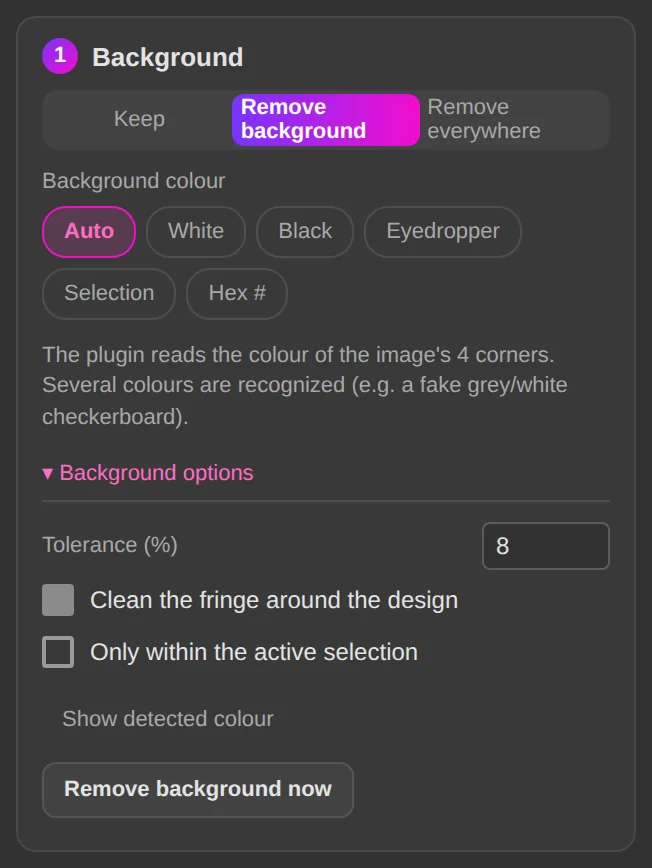
JPG, PNG, PSD or TIF, it does not matter. In the DTFForge panel, Prepare tab, the Background card reads the background colour in the corners of the image (Auto). You can also pick it with the eyedropper, type its hex code or use a selection.
- Choose what has to go
Remove background removes only the background connected to the edges: a black inside the logo stays printed. Remove everywhere removes that colour everywhere. The tolerance can be raised for slightly noisy JPG backgrounds.
- Clean the fringe
The Clean the fringe around the design option replaces edge pixels tinted by the background with the colour of the design, and Clean semi-transparency, threshold (%) turns half-transparent pixels into a clean edge so the powder sticks everywhere. One click on Preparing for DTF does it all, and sets the file to 300 dpi at the print width you want.
The File preparation module in the guide →
What you get
- A transparent PNG, with no black box and no fringe, ready for the gang sheet
- The real black of the shirt around the design, a softer transfer and less ink
- A background of any colour removed the same way: white, mock-up green, pink…
- A whole folder processed at once with the Export tab
Frequently asked questions
The logo itself contains black: will it disappear?
No, as long as you keep Remove background. Only the background connected to the edges of the image is removed; the black inside the artwork, surrounded by other colours, stays. Remove everywhere is for the cases where the colour must disappear everywhere.
What about a background with a gradient or a shadow?
A flat background is removed here. A gradient fading to black or a drop shadow is handled in the Halftone tab: the shirt colour disappears and the gradient becomes dots that print cleanly. See the page on the white halo.
Do I need a high-resolution file?
Background removal works at any resolution, but the result will never be sharper than the original. The panel shows the actual resolution at print size; below 200 dpi it turns orange. A blurry logo can be redrawn with the Vectorization module.
Try it on a real customer file
The File preparation module costs €49, one-time payment, lifetime licence. The 7-day free trial unlocks every module.